There are numerous proxy service providers available, but finding ones that support multiple IP addresses and offer high-quality IPs can be challenging. It’s essential to use a provider that offers reliable IP addresses, as some websites may block certain IPs. BrightData (formerly Luminati) is a recommended provider that meets these requirements.
We suggest using BrightData Proxy with our software because they offer thousands of IPs for free, charging only for bandwidth. It’s very cost-effective, and you’ll receive a $5 signup credit, which should suffice for regular users to scrape a substantial amount of data. Follow these steps to integrate BrightData Proxy with our software:
Step 1: Create an Account
- Sign Up: Create a BrightData Proxy account here. After registration, you will receive $5 in credits, which should last regular users several days. Verify your email address by clicking the link sent to your email. Use accurate information as future verifications may be required.
Step 2: Create a Zone
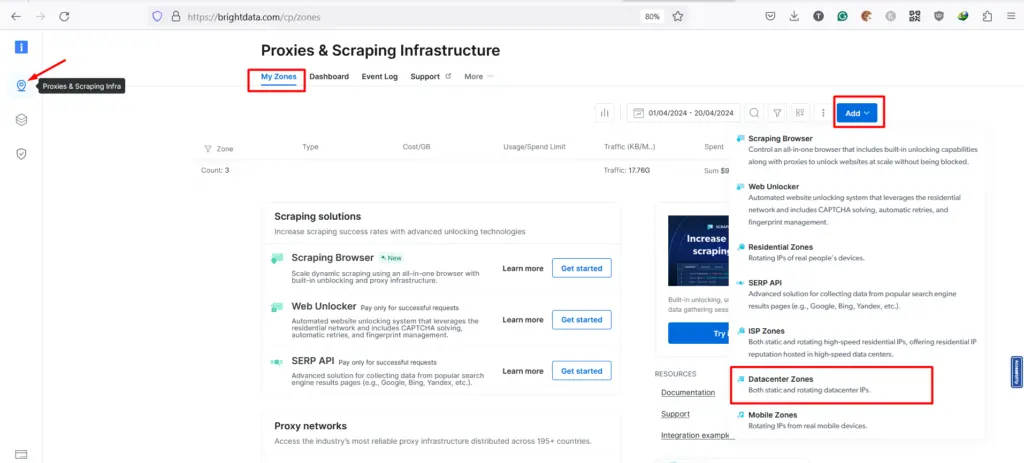
- Navigate: From the left sidebar, go to “Proxies & Scraping Infra”.
- Add Zone: Click the “Add” dropdown menu on the right side and select “Datacenter Zones”. Refer to the provided screenshot for guidance.
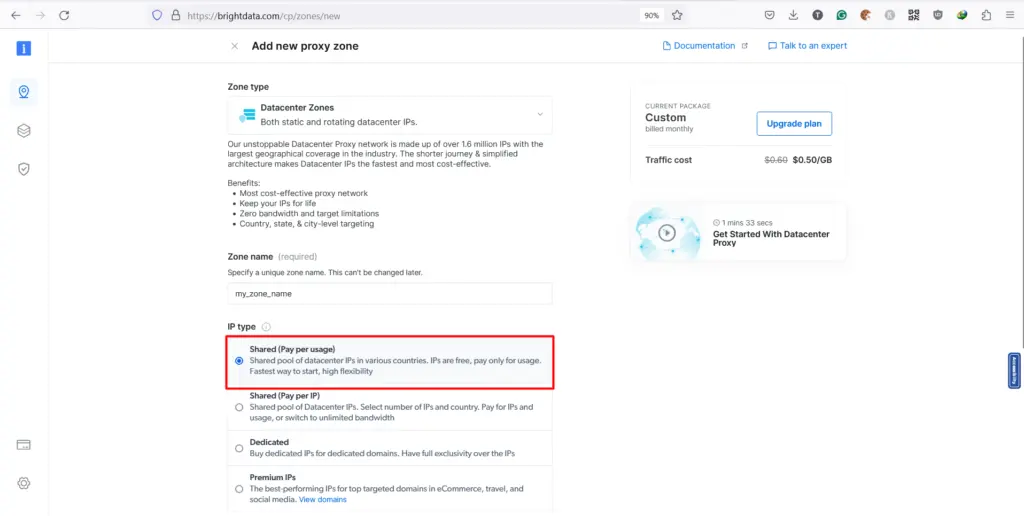
- Set Up Zone: On the next page, enter a zone name, ensure “Shared (Pay per usage)” is selected, and press “Add” or “Save”.
Please avoid selecting Residential or other expensive zones.

In the next page, enter a zone name, keep the “Shared (Pay per usage)” selected and press the button “Add” or “Save“. Check the screenshot below.

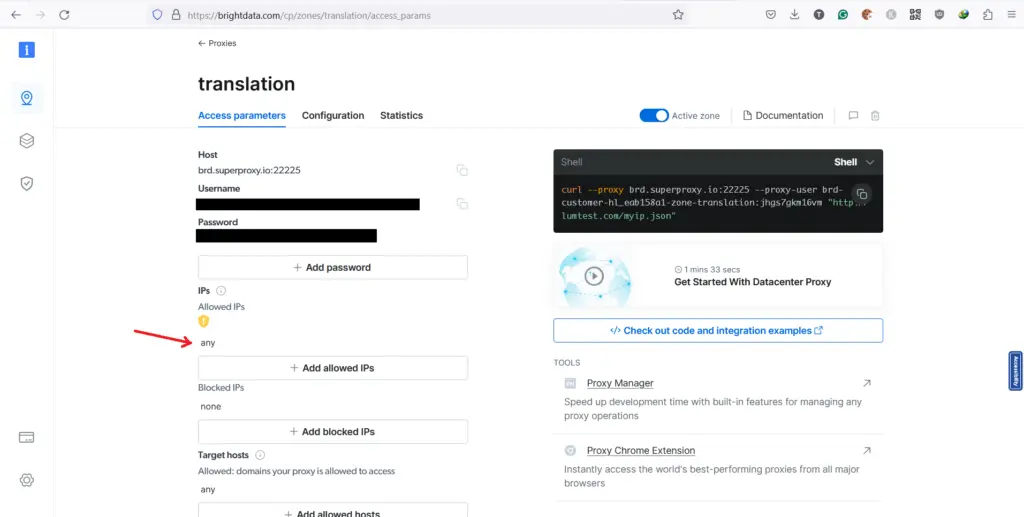
Once the zone creation is successful, you should find the access details there in the next page. You may need to click on the zone name to get this information. Please check the screenshot below.

Make sure to whitelist your computer IP address there. Please note that you can keep/make it “any”, but in some cases, they may add your IP to the blocklist automatically. So, in case you are not getting access to their network, you need to check that first.
Step 3 – Add to Software
We need the proxy in the following format HOST:PORT:USERNAME:PASSWORD for the software. In the case of BrightData, HOST:PORT=brd.superproxy.io:22225. So the proxy will be brd.superproxy.io:22225:USERNAME:PASSWORD. Copy this proxy to the Spider Flux Software and start using it.
Make sure your account has enough balance, otherwise, the software will not be able to connect to their proxy network and will not work. In some cases, the users may need to contact BrightData’s customer support to activate their account for the first time. Let us know if you face any issues.


